Sunday, April 14, 2019

Anna and Kristoff


I basically just felt like drawing something cute, and really there's nothing cuter than these two together. I also realised when drawing it that it's the first time I've ever drawn Kristoff, so that was fun. He doesn't get much love from me, but I do really like him as a character. I think the trouble with Frozen is that the characters are so strongly developed that you can't help but pick your favourites and the others end up falling by the wayside a little.

One thing I liked about drawing this is it's a much brighter colour scheme than I usually use. I realised this when I uploaded it to my grid on Instagram. I don't work with white backgrounds much, but I love how it's come out so I might have to do more of it!

Thursday, April 11, 2019

Sketchbook update

I really love working in my sketchbook, which isn't something I thought I'd be saying anytime soon as I've found sketchbooks quite stressful for a few years as my perfectionism and anxieties ate away at me from watching so many curated sketchbook tours online. It took me far longer than it should have to realise that that’s an unrealistic way to work, and that I don’t owe anyone a peek inside my sketchbook. It’s just for me unless I decide otherwise, and now I’ve reclaimed that boundary it’s become my favourite place to work!

One of the biggest issues I had before was feeling like my art would never live up to the niceness of either the sketchbook I was using, nor my work that had come before it. I'd spend ages making a pretty first page, only to then be too scared to draw on the second page and 'mess' it up! I dealt with this firstly by using a sketchbook I bought a few years ago that I absolutely hated. It's a Leuchtturm1917 sketchbook, a brand I was drawn to as it looked just like my beloved Moleskine but with a wider selection of cover options and I'd heard only positive reviews. But I hated it. I still do, although I still might be tempted to by a new one when I'm done with it (those covers!). My issue with it is simply that the paper is weird - it seems to be coated in something and so doesn't take watercolours or gouache at all, alcohol markers bleed worse than anything I've ever seen before, and it repels graphite. Compared to my previous Moleskine sketchbook which could take any medium I threw at it, this was really disappointing and I originally abandoned the sketchbook just a few pages in. And both of these things are what helped me to get over my sketchbook phobia. I'd already 'ruined' the sketchbook by messing up the first few pages, so all of the following pages looked much less scary. And because the paper is crap quality I'm not trying to fill it with finished art pieces like I used to - it's literally just a book of sketches. And that's why I might get another one of the same brand when I've filled this one, as although I hate it and it's poor quality, it's taught me that that's exactly what I need to get out of my comfort zone and lose my anxieties!


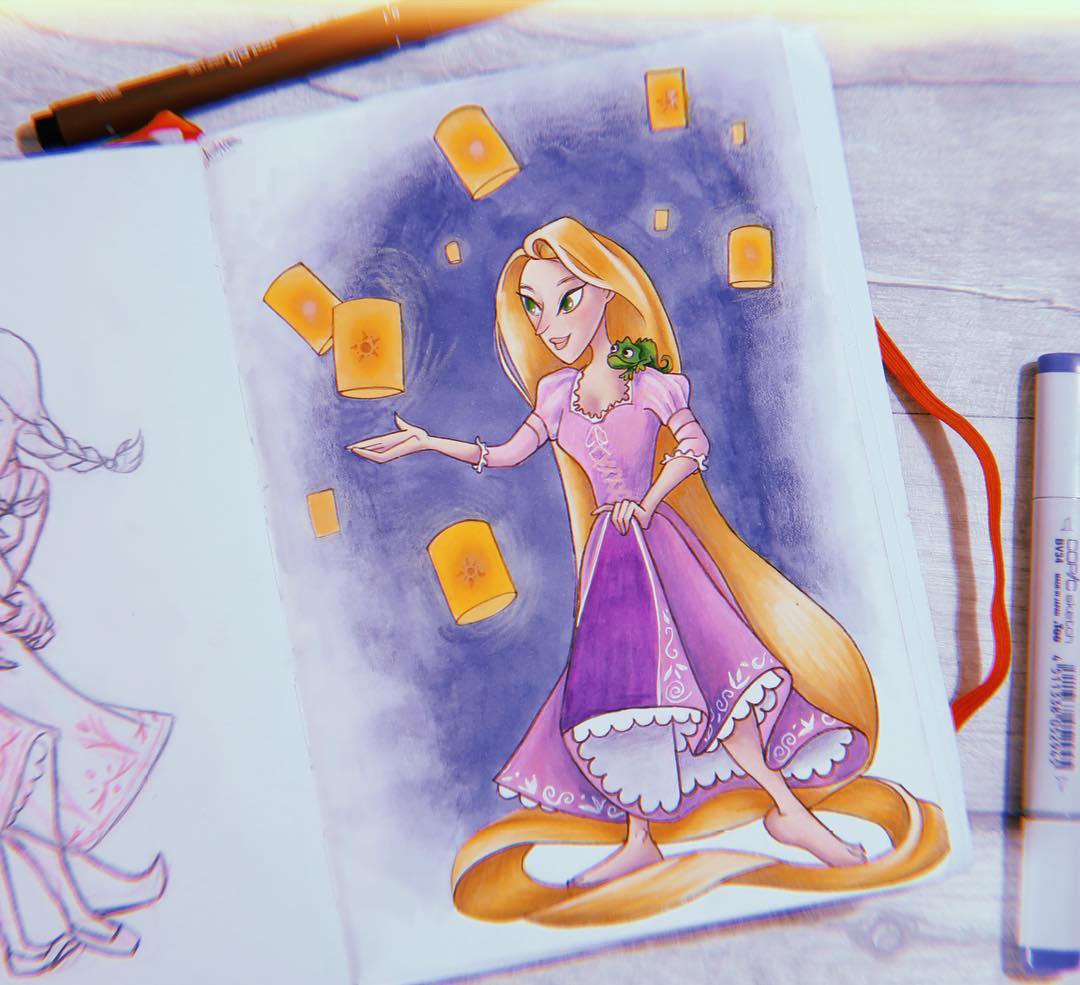
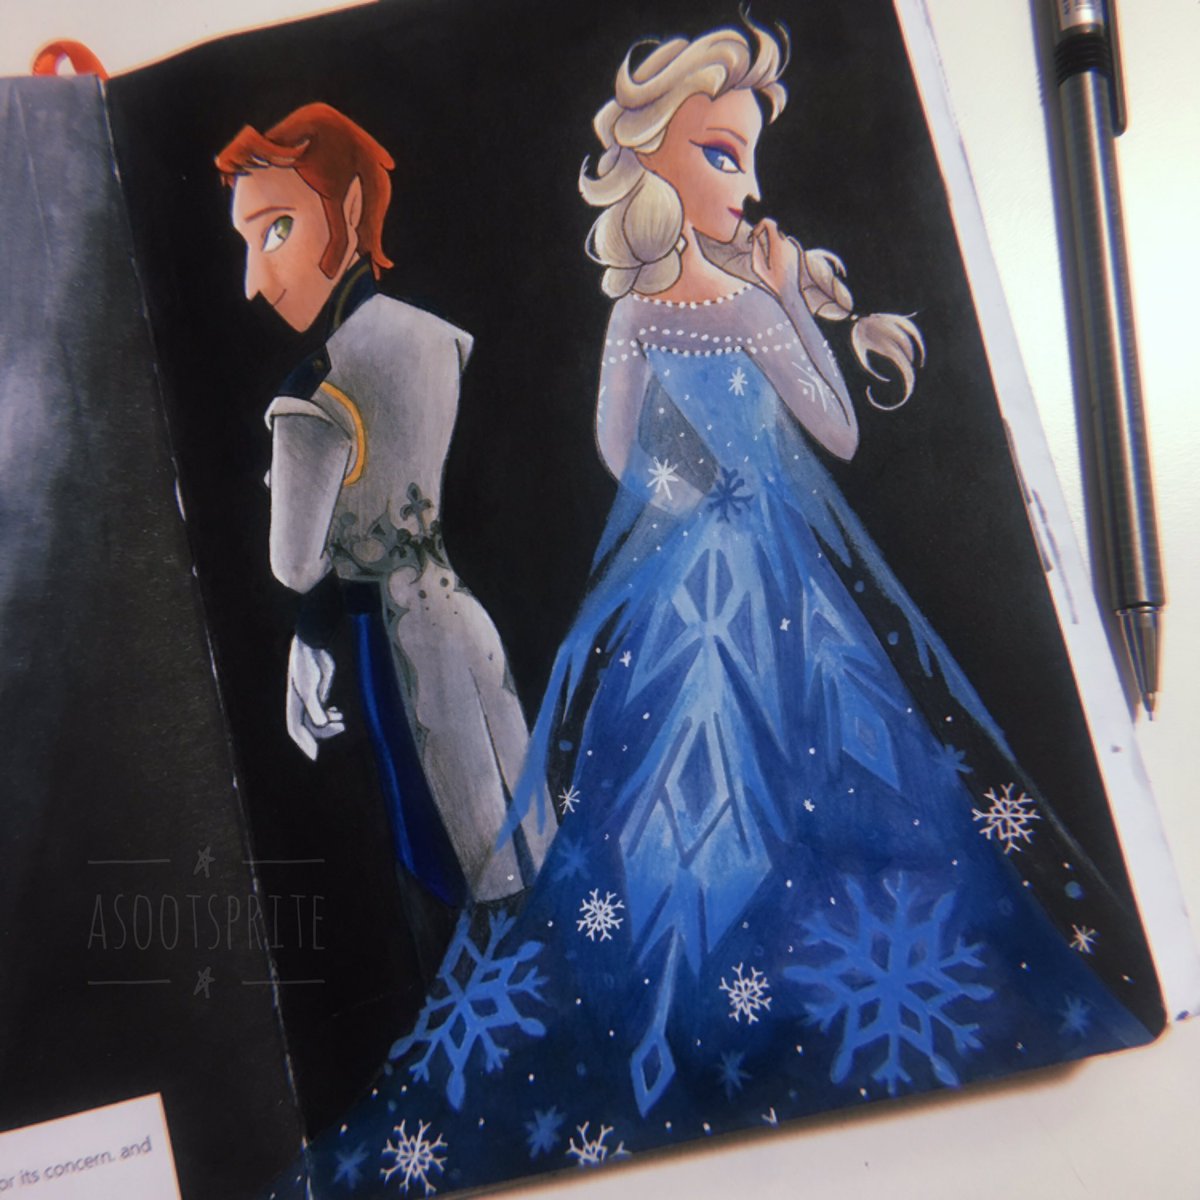
Despite just saying that I don't create finished pieces in this sketchbook, here are two finished pieces! Sometimes things just develop organically and it seems silly to transfer them and lose the fluidity of the original sketch, which is why I thought I'd share these pages. Because this sketchbook hates all of my favourite art mediums, I've had to go back what feels like basics and use coloured pencils which I'm really loving! I've got a super old set of Prismacolor Premiere pencils, and I'm loving using them again. I usually use the pencil brushes on Procreate to create texture in my digital work, so it feels good to create that texture for real!

I was inspired to draw Rapunzel as she's one of my favourites and I'd watched Tangled recently which reminded me how much I enjoy it. And the Elsa and Hans drawing was something I worked on bit by bit over a period as stress relief. My art has always been hugely important to my mental health and is almost a form of meditation to me, so sometimes there's nothing better than just switching off my brain and doodling my favourite characters. Sometimes I get a bit caught up in feeling like art has to have some kind of narrative or action involved, so it's nice to remind myself that's not the case and that there's nothing wrong with drawing characters just to create a pretty image with no deeper meaning than that.


Tuesday, April 9, 2019

Frozen custom dolls

Disney Frozen doll customization face ups - Anna Elsa Hans

Here's something a little different, but I was recently drawn into the the world of doll customization! It's something I've only been interested in for literally a couple of weeks, and all began when I was Googling for Frozen dolls and came across the most beautiful doll of Anna. I'm not actually a doll person, or at least I wasn't until this past month; even as a little girl I preferred plushies and cute animals and things to Barbie, so although I vaguely knew doll customization was a thing that people did I'd never given it any thought until I saw this Anna doll that cost a few hundred and figured surely I could make my own? After all I'm an illustrator and dressmaker so surely I have a leg up already. I began watching doll face ups on YouTube out of interest and I was shocked to learn it's mostly coloured pencils and very little painting at all, which is great for me as I adore coloured pencils and hate intricate paint work. I eBayed a cheap set of Frozen dolls that had clearly been well played with as I figured I won't mind so much if I messed them up, and I set to work. And it ended up being a lot of fun! It's so weird to sketch on something 3D as I'm obviously used to flat paper, but otherwise I feel I took to the hobby pretty quickly and am really pleased with my first attempts. Customizing these dolls made me feel a lot like that old guy in Toy Story 2 who fixes up Woody.

Disney Frozen doll customization face ups - Anna

My very first attempt was Anna, I don't know why I picked her first but I felt inspired by her frizzy hair and threadbare clothes and wanted to make her look like a princess again. You can see a before of her here. I started by soaking her hair in fabric softener which I'd read helped with frizzy doll hair, and it did precisely nothing. I then tentatively tried my straighteners on a low heat and quickly learnt that her hair isn't heatproof! Boiling water straight out of the kettle ended up being what worked - I simply sat her in the sink and poured the water straight on her head and left it to air dry. I then trimmed any remaining frizz out, styled her braids and gave her a white streak, cut in a more screen accurate fringe and trimmed the tips of the braids so they looked more natural and less doll-like.

Disney Frozen doll customization face ups - Anna

I then moved onto her cape, stitching tiny pom pom trim around the edges which I dyed with my Copic markers as I couldn't buy it in the right shade of purple, and I added some basic hand embroidery. I wasn't too bothered about the embroidery being screen accurate as long as it resembled it - and it was plain originally so I figured anything I did was a step up from that! I also painted over some of the printed details on her dress, trimmed away any fraying, and added some detailing to her blouse (which is hidden by her cape, but the attention to detail is there anyway!) She didn't come with her cap, but if I can find some felt in the right shade of magenta I might have to make her one at some point, and perhaps knit her some tiny mittens! I was really pleased with how effortlessly her face up came together through simply using chalk pastels, watercolour pencils, and the all important Mr Super Clear sealant.

Disney Frozen doll customization face ups - Anna Elsa

Next was Elsa, who is my personal favourite of the two sisters, and I had a lot of fun with her as I'd learnt so much from Anna so had a better idea of what I was doing. You can see Elsa's before picture here. Her hair was originally scrapped back into a tight plait, and as we all know Elsa's hairstyle is much more loose and relaxed so first thing I did was give her hair some layers. I then curled those layers by using cut up straws like rollers and pouring boiling water over the top and allowing it to dry naturally. It's given her hair some much needed volume at the top of her head, and allowed me to section pieces off for a more screen accurate style. I used Got2be Glued hairspray, and styled it much the same as I did my cosplay wig, only on a much smaller scale. I didn't have any snowflake clips small enough, so I just glued some rhinestones onto her braid to give a similar effect.

She'd obviously been well played with and her dress was practically falling apart so required stitching back together first and foremost. Her dress was plain blue, so I mostly focused on adding sparkle to her bodice simply by gluing rhinestones and glitter onto it with fabric glue. I used glitter and fabric glue to add detailing to her sleeves, and gave her full outfit a subtle sprinkle of glitter (using a light spritz of hairspray to keep it in place - a good tip to use for any glittery clothing you may have too!) Her face felt fairly basic, as it's almost the same as Anna's just in a different colour scheme.

Disney Frozen doll customization face ups - Elsa

Next up was Hans. I was working my way up to the male dolls as I feel less confident drawing male characters in general (something I'm working hard to improve on in my art the past couple of months), and I wasn't sure how to draw his features without making it look like he's wearing makeup. Also I was intimidated by the molded hair and how I might approach that. For Anna and Elsa I'd obviously only had to draw their eyebrows and was able to build up a natural looking texture on the flat surface of their foreheads, but I wasn't sure if I'd be able to get the same texture for Hans' sideburns for example. I took a lot more pictures of Hans in the before stages as I'd forgotten to with the girls and regretted it after it was too late, so here's what he looked like originally. He was actually in really nice condition and I'm guessing he didn't get played with much - kids just don't understand the complexity of an antagonist! He had some light staining to his jacket, but most of the flaws in the doll were done by Disney. Hans is my favourite character along with Elsa, so it felt important for me to get this doll right.

BEFORE
Disney Frozen doll customization face ups - Hans

Disney Frozen doll customization face ups - Hans

I kind of did everything at once with Hans, and as a result managed to get him finished in a couple of days rather than a full week like the others. While I was waiting for the sealant on his face to dry before I could add another layer of pencil I was working on his clothes, and while I was waiting for fabric glue and clay to dry I was drawing up his face.

Firstly I obviously wanted to remove the horrendous paint job. His freckles looked more like moles, and whilst he's very clearly a redhead in the movie they'd decided to paint his hair dark brown and metallic(!?!). It all had to go.

AFTER
Disney Frozen doll customization face ups - Hans

I couldn't get in all of the crevices of his molded hair with the acetone so some of the original paint remained, but I wasn't that bothered as I figured it would give the impression of depth and shadow in his hair. I simply brushed layers upon layers of orange and sienna brown chalk pastels until I had the right shade of auburn for our ginger prince, using a fine paintbrush to make sure it was covering the paint I couldn't remove. I also lightly brushed the pigment over his sideburns, but left most of those to the coloured pencils.

I also really hated how cheap his outfit looked, so I knew it needed some serious work. First thing I did was simply iron some interfacing to the inside of his jacket to give it some structure. Such an easy fix and it made the world of difference to how his clothes fitted him. I also hated the painted on buttons, and after searching around online for something that might work, I decided to just make my own. I had some rhinestones in the right sizes, so I simply painted them with acrylic paints before giving them a coat of clear nail varnish to make them shiny and level. I also used the acrylic paint I'd mixed to extend the design around the back of his jacket - it's not completely screen accurate as I didn't want it to touch the existing pattern on the front of his jacket as it would make it obvious it wasn't the same.

Disney Frozen doll customization face ups - Hans

I made the aiglets using Fimo clay that I painted gold, and glued it onto gold embroidery thread to emulate real aiguillettes. The gold braid that came on the doll I stitched into place to join up with the embroidery thread and glued a 'button' over the top, both to hide the join and also as the real Hans has a button right there for his aiguillettes too.

Disney Frozen doll customization face ups - Hans

Lastly, I bought a thin strip of ribbon in the same shade of blue as his shirt collar (getting some very funny looks in the craft shop as I pulled the miniature outfit out of my pocket to colour match!) and carefully hand-stitched it down the legs of his trousers. Fin! (I do wish he had proper gloves instead of mittens - seriously how can he be threatening wearing those? But he doesn't have individual fingers and they're what he came with so I figured they should stay as their important to his character)

I'm really proud of how these dolls came out, especially considering I've never done anything like this before. I always go easy on myself with new pursuits as it's inevitable you won't be perfect first time, so it's a real confidence boost when it all goes right! I do still have a Kristoff doll to customize, but I'm itching to pick my neglected sketchbook back up so he'll just have to wait for now.

Disney Frozen doll customization face ups - Hans

Saturday, February 16, 2019

Wickedness must be punished, Kill the Witch!


I kind of dreamed this up and had it as a thumbnail in my sketchbook for the longest time. I was going back through my rough drafts recently and decided to get it actually drawn up as I like the idea, even if it is a bit dark. It's difficult to imagine Elphaba and Fiyero could escape the Emerald City without the Gale Force being close behind, watching (especially if you're familiar with the book, I was definitely inspired by Fiyero's final scene)

It was harder to draw than I anticipated, mostly just trying to work out how much 'there' was just the right amount for the Gale Force. They needed to be visible enough for the viewer to see them lurking, but not clear enough that Elphaba and Fiyero just appear stupidly oblivious. Hopefully I got the balance right!

This was one of the few art pieces I've done recently where I was thinking of an end product while I was creating it, which was mostly poster design and thinking in terms of movie posters and the like. Something narrative driven, that can still be understood by those unfamiliar with the plot and exists wholly within the one illustration. Which I think is why I feel like I don't have a whole lot to say about this piece, as I intended it to talk for me and require no explanation. Hopefully it should make a nice print!

Monday, February 11, 2019

Diamonds are forever


In June this year, Moulin Rouge is opening on Broadway and I'm so excited! It's one of my all time favourite movies, and they've done such a wonderful job updating and adapting it for the stage. It's always been on my list of dreams to one day visit New York specifically for Broadway. Although I often see stuff at the West End, Broadway often has shows we don't and sometimes never get. Add to that that two of my favourite performers are the leads in Moulin Rouge and I knew I had to make 'one day' happen soon, and I'm going in August! I'm so excited, I'm going to be in New York for 6 days and so far have plans to see Moulin Rouge twice, Frozen and Wicked (I know Wicked won't be much different than London, but I have to see where my favourite show originated!). I was hoping to see Anastasia too, but unfortunately it's announced it's closing which frees up a night. I'm so excited! I never thought I'd be able to do this, and I've funded most of it by selling stuff and seeking out deals (and accepting the fact I'll be living on ramen noodles while I'm there!). I've really taught myself what I can make happen when I put my mind to it.

The wonderful Karen Olivo is going to be playing Satine, and she looks so stunning I just had to draw her!

Thursday, January 31, 2019

Frozen hearts + Etsy update


Can you believe, I drew something that isn't Wicked?! Don't worry, it won't last, I'm already working on two more Wicked illustrations, but I wanted to share this Frozen drawing that I doodled while watching the movie. I'm really into Frozen at the moment, it's been my favourite Disney film for years but the Broadway show has helped it grab my interest all over again and I'm going through that phase. Hans and Elsa are my favourite characters, and as messed up as it is I do kind of ship it (only not kind of, I ship it a lot, but people can get pissy about that kind of thing so I mostly keep it to myself). This is more of a "I wonder what they'd look like in my style" than a proper illustration, but I'm really pleased with it and want to make some proper Frozen art at some point!


Also I've opened my Etsy store!🎉 I only have two items on there right now, a set of postcards and a set of stickers both based around my Wicked character illustrations, but I figured I may as well just get it open and let more and more items trickle in to my inventory otherwise I'll always have excuses not to open it!

Wednesday, January 9, 2019

Cintiq vs iPad Pro

I said goodbye to my Wacom Cintiq this week, which actually makes me really sad!


It was around two years ago that I decided that I wanted to start getting into digital art, and I knew that the first step was to upgrade my drawing tablet. At that point I only owned an 11 year old Wacom Graphire 4 which no longer worked on my OS as the drivers were so outdated, and I'd never gotten along with it when it had worked. I believe it was the precursor to the Bamboo as it was the cheapest tablet Wacom sold at the time, and I could never get used to looking at the computer screen whilst my hand drew elsewhere so it ended up just being used for cleaning up scans of traditional work.

I was always fascinated by Cintiqs ever since I first heard of them, and when I enrolled into art school it was one of the first things I checked for in resources. They had an old 12XW model which I was so excited to borrow that I never even realised I needed a HDMI port which my laptop at the time didn't have! Gutted! However when I did manage to get it working, I loved how natural it made drawing on the computer feel as there was almost no learning curve like there had been with my Graphire.

By the time I was at a point that I could afford my own display tablet, the iPad Pro was coming more and more to the fore which threw me into a bit of a quandary. Initially I wasn't keen on getting an iPad as I own an iPhone, and an iPad just felt like a larger version of that. Plus I'd used a Cintiq and knew I liked it. However what I wasn't keen on with the Cintiq was how long it took to set up, all of the wires required, and the fact that it didn't offer any portability. After A LOT of research on both tablets (unfortunately there weren't any comparison reviews back then) I went for the iPad Pro mostly for the portability aspect. I loved the thought of being able to take it anywhere without being wired up to my laptop, I envisioned it as being like a digital sketchbook. However it didn't take me long before I felt I'd made a mistake, and that I should of gotten the Cintiq after all.

When I first got my iPad Pro I honestly hated drawing on it. A large part was due to the glass screen, which probably sounds trivial but it means the tip of the Apple Pencil has nothing to grip so there's no friction. It just glides around the ultra smooth surface, making it difficult to have the same level of control and precision that I have drawing traditionally. I also couldn't get to grips with Procreate, the biggest art program for the iPad. It frustrated me as I was on a learning curve with digital art anyway, so to also have zero familiarity with the program I was using left me ultra lost and I craved the comfort of Photoshop that I knew so well. Also little things began to bug me, like the fact that I felt like I was constantly transferring files between my PC and my iPad. I ended up mostly using it to watch YouTube whilst the Apple Pencil collected dust, and six months later I bought a secondhand Cintiq 13HD on eBay.


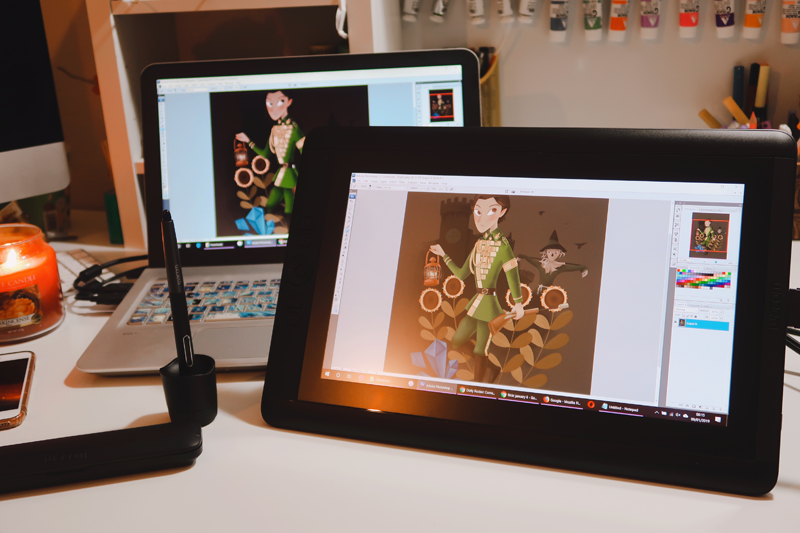
I loved the Cintiq immediately, and did use it quite a bit in my final year of art school. I bought a 15" laptop sleeve to carry it about in, but my back soon grew weary from carrying both the Cintiq and my laptop around every single day. I didn't have the space to have the Cintiq set up on my desk constantly, and getting it all out and putting it all away again felt like a real hassle - especially as the Wacom drivers usually crashed and needed to be restarted almost every time, or the pen pressure sensitivity would randomly cut out, so it would take me a while to get everything set up before I could even draw anything. Obviously the biggest positive to the Cintiq was the fact that it still allowed me to use Photoshop, the program I'd been using for 15 years and was used to, as well as having all of the files on my computer right at my finger tips so it really complimented my work flow. But the lack of portability and huge set up meant that I wasn't using it, and so owning it hadn't made me want to experiment with digital art like I had hoped it would.

Last year I heard of PaperLike, a screen protector for an iPad that feels like drawing on paper, and although it was pricey I bought it immediately. My iPad already felt like a waste of money by then that I was considering selling, and I was skeptical about how much difference a screen protector would make, but decided to make one last ditch attempt at getting along with it. Thankfully PaperLike was true to it's promise, it literally makes it feel like I'm drawing on paper and it's made my iPad feel more comfortable to my traditionally trained mind. The only draw back to the Paperlike is that it does stop the screen from being quite as crystal clear as it is without. It doesn't obscure anything so it's fine for drawing, but when I do just want to curl up with YouTube it can be slightly annoying. Although expensive, it's worth every penny to my mind as it's taken my iPad to being a fully functioning piece of art kit that I wouldn't be without now.

After I'd gotten the screen issue sorted out, it took me a really long time to actually sit down and force myself to learn Procreate, mostly as I had art block and wasn't motivated to draw anything. But as soon as I had drawn a couple of pieces I was well on my way and pleasantly surprised with how much Procreate can do. Now I know what brushes I enjoy and which shortcuts to use, drawing on my iPad feels as natural as drawing in my sketchbook, and I'm actually starting to feel really passionately about digital art and the limitations it removes from my process.

Also, just like I'd hoped when I originally bought it, I love the portability of the iPad. It's even more portable than my sketchbook as it's much slimmer and I only need the one pencil to have a full range of art supplies in every colour imaginable. I have the 9.5" model which is perfect for me as it's slightly larger than A5 which is the size I most frequently work in, and obviously it keeps it portable as a larger iPad wouldn't fit in my everyday bag. I feel large screens are only really necessary for Cintiq's as you are restrained by Photoshop's frames and toolbars which need to be large enough to be able to access. Procreate is so much more intuitive and allows me to use the full screen so it's not an issue. I also love the fact that I can't ever lose work on my iPad as Procreate saves my progress automatically - I can't tell you how many times I've cried real tears because I forgot to save something in Photoshop and lost hours of work when it crashed. The iPad has quickly become my preferred drawing method, even over traditional art right now. Really now the only drawback I have with it is the fact that I can only draw for as long as the battery will last, which isn't the end of the world, just a slight annoyance.

I obviously couldn't justify keeping my Cintiq as well, plus I'm saving up for a big trip this year, so this week I sold it on and said goodbye. Like I said, I am sad to see it go, as despite how much faffing about it took to set up I did really love using it. I just hope I don't come to regret it now! 😬
© a soot sprite. Design by FCD.